- Enable POP in your email account. Don't forget to click Save Changes when you're done.
- Open Outlook or Outlook Express.
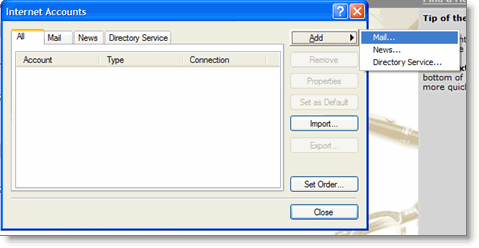
- Click the Tools menu, and select Accounts...
- Click Add, and then click Mail...
- Enter your name in the Display name: field, and click Next.
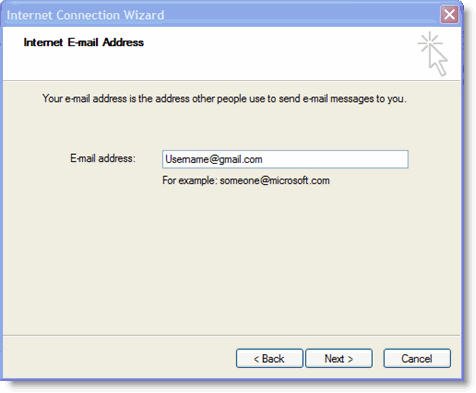
- Enter your full Gmail email address (username@gmail.com) in the Email address: field, and click Next. Google Apps users, enter your full address in the format 'username@your_domain.com.'
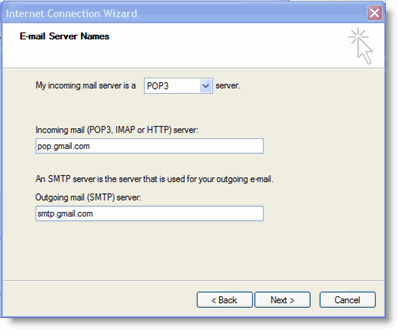
- Enter pop.gmail.com in the Incoming mail (POP3, IMAP2 or HTTP) server: field. Enter smtp.gmail.com in theOutgoing mail (SMTP) server: field. Google Apps users, enter the server names provided; don't add your domain3name in this step.
- Click Next.
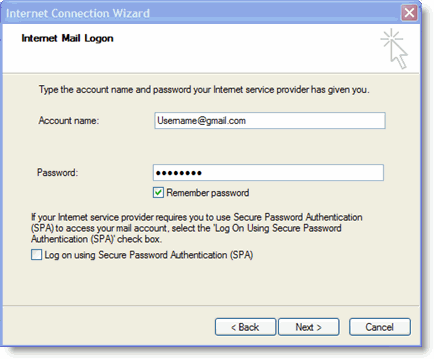
- Enter your full email address (including '@gmail.com' or '@your_domain.com') in the Account name: field. Enter your email password in the Password: field, and click Next.
- Click Finish.
- Highlight pop.gmail.com under Account, and click Properties.
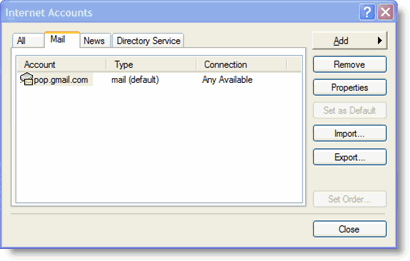
- Click the Advanced tab.
- Fill in the following information:*
- Check the box next to This server requires a secure connection (SSL) under Outgoing Mail (SMTP).
- Enter 465 in the Outgoing mail (SMTP): field.
- Under Outgoing Mail (SMTP), check the box next to This server requires a secure connection (SSL).
- Under Incoming mail (POP3), check the box next to This server requires a secure connection (SSL). The port will change to 995.
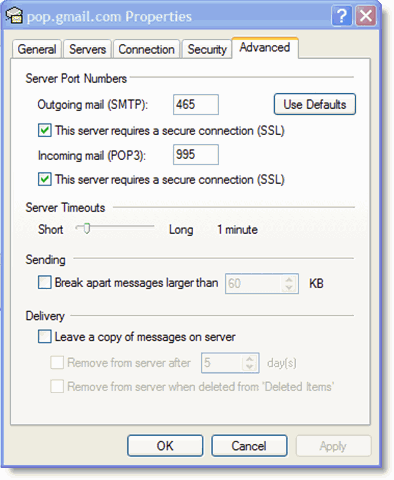
*The order of Outgoing and Incoming mail server4 fields varies by version. Make sure you enter the correct information in each field.
- Return to the Servers tab, and check the box next to My server requires authentication.
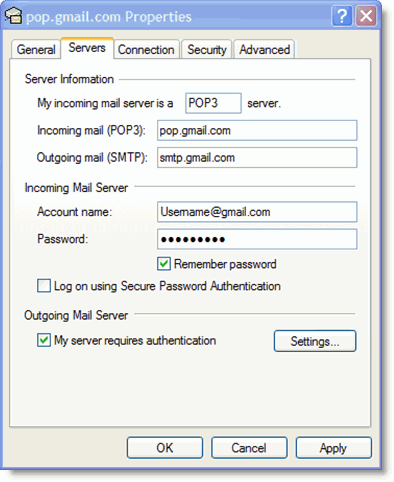
- Click OK.
Congratulations! You're done configuring your client to send and retrieve Gmail messages.
